Popcorn Texture Removal Process, Tips and Guide
Popcorn texture removal can be easily done. All you need to do is a plan and days when you are free of duties and don’t have anything else to do. The detailed instructions would help you remove popcorn ceiling by using the texture scraper for removing the popcorn texture.
The Tools You Would Need
You would need
- Ceiling Texture Scrapper
- Nail Gun
- Rubber Gloves
- Sanding Sponge
- Hammer
- Cordless Drill
- Clamps
- Safety Glasses,
- Compound Miter Saw
- Wood Chisel
- Plastic Sheeting
The materials required
- Tape
- Drywall compound
- Paint stripper
- Crown molding
Step number 1: Prepare your room
Relocate all the furniture that is present in the room. By hanging 2-millimeter plastic sheets from the crown moulding all the way to the floor, seal off your entire room. Add a drop cloth to the floor and put a window fan in the window for extra ventilation.
Step number 2: Spray the Ceiling
Wet down the ceiling by using a basic garden sprayer. Work in 5 feet square area. It is much better to make several passes than allowing the ceiling to absorb too much water which could damage the surface plus the wallboards underneath.
Step number 3: Scrape
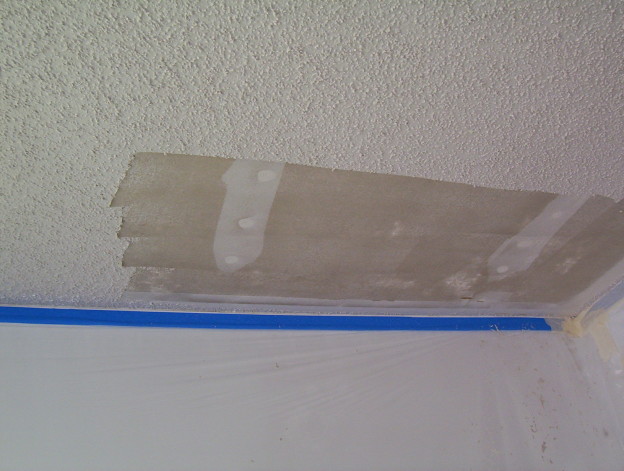
Now, you are halfway there when it comes to popcorn texture removal. Wait for 10 to 15 minutes for the water to soak in. When 10 minutes are up, start scraping it off by using a ceiling texture scraper. Scrape the corners by using a smaller putty knife and crown moulding.
Step number 4: Paint
As soon as you are done, you would need to paint the ceilings.
-Get ideas for better and decorative paint techniques and paint finishes which you can use on your furniture wall and more.
Safety
While doing all the work your safety should be the number one priority, use the tools and instruments in such a way that you have no fear of hurting yourself. Do it with complete safety and care.

